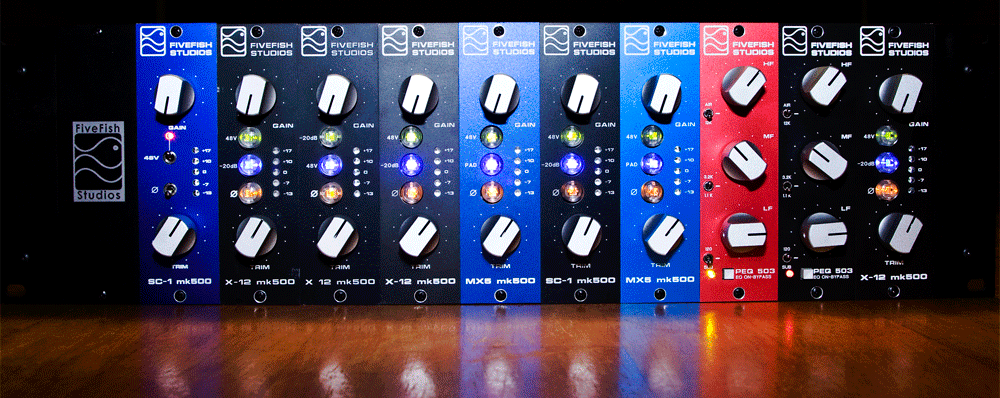
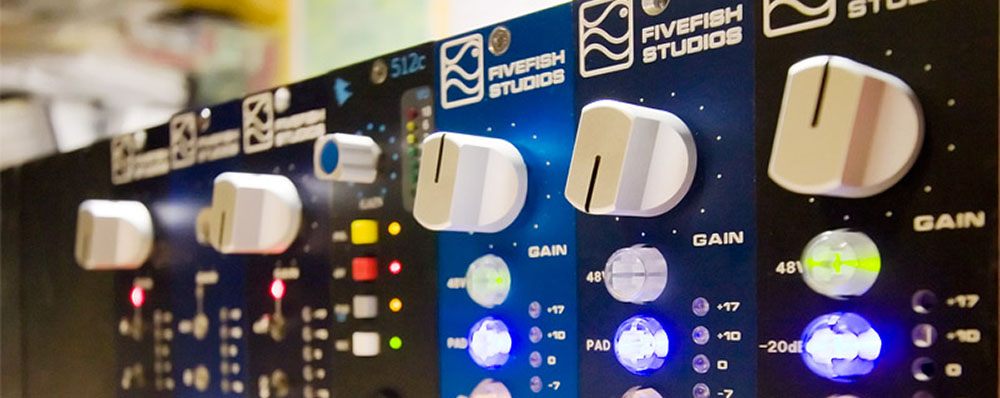
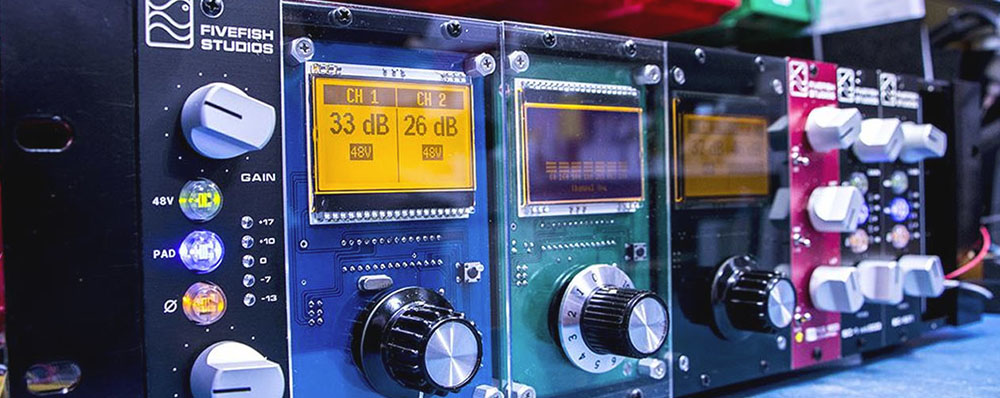
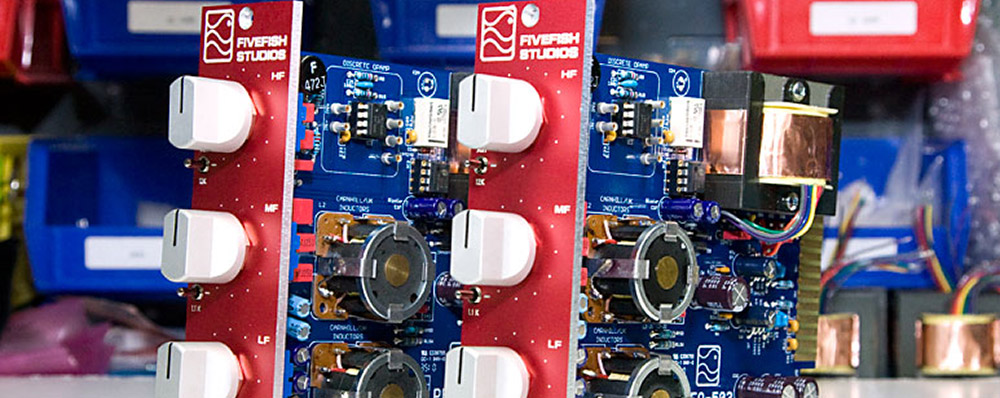
| View previous topic :: View next topic |
|
|
| Author |
Message |
xuxa
Joined: 04 Aug 2008 Posts: 7 Location: Los Angeles
|
Posted: Mon Aug 04, 2008 11:22 am Post subject: PSU voltage test - 65v |
|
|
I am having difficulty testing my newly assembled PSU-1848 + 1U PWR-TRAFO kit. When I place the red lead from my voltmeter on any of the 8 output pads and the black lead on the ground wire coming from the wall (no ground physically connected to the PSU), the voltmeter reads about 65v. Turning the 5K trimpot while measuring does not seem to change anything.
If I connect the GND and GND2 pads to the middle pin coming from the wall socket and measure the same way, I get voltages at or near 0v along all the output pads.
I've double-checked that there are no shorts in my soldering (I don't have a magnifying glass but there certainly appears to be generous gaps between all joints.) I've double-checked the orientation of the electrolytic capacitors, rectifiers, diodes, and trimpots. I think I've got the correct color leads going from the transformer to the correct pads on the PSU. Hrm...
Perhaps I'm simply doing these measurements wrong? Any suggestions would be greatly appreciated! |
|
| Back to top |
|
 |
xuxa
Joined: 04 Aug 2008 Posts: 7 Location: Los Angeles
|
Posted: Mon Aug 04, 2008 11:28 am Post subject: Slightly different resistors |
|
|
| For what it's worth, the R1, R8, and R9 resistors that came with my kit are 3.57k (orange, green, violet, brown), instead of 3.3k, as specified on the PCB. I can't imagine that that's the issue, but I thought I'd mention it just in case. |
|
| Back to top |
|
 |
owel
Joined: 25 Jun 2007 Posts: 1219 Location: Music City
|
Posted: Mon Aug 04, 2008 2:40 pm Post subject: |
|
|
The most common problem is people swap the LM317 to the LM337 and solder it to the wrong location.
The PCB is labled on which regulator goes to which spot.
The resistor isn't a problem.
| Quote: | | When I place the red lead from my voltmeter on any of the 8 output pads and the black lead on the ground wire coming from the wall (no ground physically connected to the PSU), the voltmeter reads about 65v. Turning the 5K trimpot while measuring does not seem to change anything. |
Coming from the wall? Please check that you follow the wiring diagram in the instructions for the Power Transformer Kit and PSU-1848 kit.
The GND wire from the wall outlet just goes to the 3rd prong on the IEC connector. The GND wire on the PCB goes to the center tap of the transformer secondary.
Please check your wiring.
For measuring voltages, put the black test leads on GND pad (labled on the PCB) and the red leads to the +48, +18 and -18 pads.
If you're getting +65Volts on all of them, sounds like a short. _________________
 |
|
| Back to top |
|
 |
xuxa
Joined: 04 Aug 2008 Posts: 7 Location: Los Angeles
|
Posted: Mon Aug 04, 2008 4:09 pm Post subject: LM317 / LM337 switched! |
|
|
Hello Owel! Thank you for the response and your quick evaluation of the problem. You were exactly right that I have switched LM317 and LM337. Silly me... I assumed they were all the same part.
[quote]The GND wire from the wall outlet just goes to the 3rd prong on the IEC connector. The GND wire on the PCB goes to the center tap of the transformer secondary. [/quote]
I'm a little confused by what you mean by the "GND wire on the PCB". I have wired the transformer to the PCB following the instructions on page 4 and this image,
http://farm3.static.flickr.com/2161/2224371758_d7b967f9b0_o.jpg
I have the black wire soldered to PCB pad "AC1", the Red and Orange wires both to "CT", and the yellow wire soldered to "AC2". Should I also have the CT going to a GND pad somewhere?
In the meantime, I'll switch the LM317 and LM337 parts.
Thank you so much, Owel! |
|
| Back to top |
|
 |
owel
Joined: 25 Jun 2007 Posts: 1219 Location: Music City
|
Posted: Mon Aug 04, 2008 4:16 pm Post subject: |
|
|
Try swapping the 2 regulators first. I'm surprised you didn't see any resistor smoked.
Note: Some people have reported their psu started working after they swap back the regulators in their right location.
While others had to get replacement regulators to make it working again.
Let me know how it goes. _________________
 |
|
| Back to top |
|
 |
owel
Joined: 25 Jun 2007 Posts: 1219 Location: Music City
|
Posted: Mon Aug 04, 2008 4:18 pm Post subject: |
|
|
The GND pad on the lower right of the PCB. See this pic.
So put your black lead meters on this spot, and check the output voltage on the 48V pad, (+) Pad and (-) pad. _________________
 |
|
| Back to top |
|
 |
xuxa
Joined: 04 Aug 2008 Posts: 7 Location: Los Angeles
|
Posted: Mon Aug 04, 2008 4:50 pm Post subject: No love after switching LM317 and LM 337 |
|
|
Alas, switching the regulators didn't do the trick. I assume I've fried them and can get some through DigiKey or Mouser?
I've taken a pic of how I'm testing, just to make sure I'm doing something *really* dumb. http://k--b.org/IMG_0661.JPG
Thank you for all your help Owel. I'm embarrassed to bother you with this, especially after you've obviously put so much time into making the build clear. It's not you, it me! :)
Kris |
|
| Back to top |
|
 |
owel
Joined: 25 Jun 2007 Posts: 1219 Location: Music City
|
Posted: Mon Aug 04, 2008 4:56 pm Post subject: |
|
|
I see one LED lit up So that section is good.
Yes, I think you need replacement LM317 and LM337.
Re: photo. Yes, that's correct way. I think just need to replace the regulators and you'll be up and running again. _________________
 |
|
| Back to top |
|
 |
xuxa
Joined: 04 Aug 2008 Posts: 7 Location: Los Angeles
|
|
| Back to top |
|
 |
owel
Joined: 25 Jun 2007 Posts: 1219 Location: Music City
|
Posted: Mon Aug 04, 2008 5:24 pm Post subject: |
|
|
Let me just send you replacement regulators via US Mail. No charge.
PM me your address. _________________
 |
|
| Back to top |
|
 |
xuxa
Joined: 04 Aug 2008 Posts: 7 Location: Los Angeles
|
Posted: Sun Aug 10, 2008 1:13 am Post subject: |
|
|
Hello Owel! I received the replacement regulators yesterday. Thank you so much!
I'm resoldering and testing my connections. In all the soldering and unsoldering, I believe I have broken the PCB trace coming off the center pin of the LM337 regulator. Am I right in thinking I should jumper the center pin of LM337 to the inside pin of the D4 diode (the side of that diode near the capacitors)? I'm looking at the PCB as shown on page 8 of the assembly instructions... |
|
| Back to top |
|
 |
owel
Joined: 25 Jun 2007 Posts: 1219 Location: Music City
|
Posted: Sun Aug 10, 2008 1:16 am Post subject: |
|
|
| xuxa wrote: | Hello Owel! I received the replacement regulators yesterday. Thank you so much!
I'm resoldering and testing my connections. In all the soldering and unsoldering, I believe I have broken the PCB trace coming off the center pin of the LM337 regulator. Am I right in thinking I should jumper the center pin of LM337 to the inside pin of the D4 diode (the side of that diode near the capacitors)? I'm looking at the PCB as shown on page 8 of the assembly instructions... |
Yes, the middle pin of LM337 connects to the ANODE of D4. (i,.e. the side without the white band)... nearest C17/C13. _________________
 |
|
| Back to top |
|
 |
xuxa
Joined: 04 Aug 2008 Posts: 7 Location: Los Angeles
|
Posted: Sun Aug 10, 2008 2:28 am Post subject: Success! Fried regulators replaced, broken trace jumpered |
|
|
Owel... it works! And boy it works perfectly! The initial voltage values were 10-15v off but of course the trimpots did the trick. I'm surprised what a wide range of voltages this PSU can provide. This PSU would be useful for all sorts of electronics projects...
Anyway, thank you again so very much for all the help! Sorry to take up a bunch of your time with my mistakes. A good friend of mine (Jon B) also ordered the same kit and I'll make sure he doesn't switch the regulators. :)
Thanks again... this is really getting fun now!
Kris |
|
| Back to top |
|
 |
|